Hey Guys!
This is a little talk through about how I achieved my current nail designs. I painted them on Thursday afternoon, ready for a Friday night out, and they are still intact! I was looking on line for slightly unusual and snazzier designs for a french manicure. I’ve had a look on the blog that I found my inspiration on and, she’s got some pretty groovy designs on there (paintthatnail.com).
 |
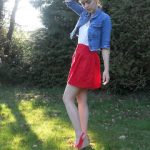
| These are the nails I was inspired by. |
My nails are alot smaller and shorter than hers, so I’ve got less space to play with. But I managed to come up with something similar.
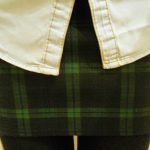
First, I obviously painted my miracle grow nail varnish on and a base coat over that. Then I applied 2 layers of a ballet pink kind of colour. Mine was actually called ” ” and it’s by natural collection. I then painted the thin white tip by free hand. After years of practise, I’ve become pretty good at it. but if you’re just beginning you can use nail guides, curved stickers to give a guide to the rounded shape. Then painted a final layer of my “Peach Manicure” which makes the “Nail Tip Whitener”, also by Natural collection, look more natural. I then chose a coral pink nail polish and used a very thin ordinary paint brush to create small strokes in the top-left-hand corner of each nail. I never use the paint brushes for anything else and I have so many of them, I’ve finally put them to good use. As I mentioned, with my nails not being as long as hers, I’ve chosen to just paint the corners with pink. I then used a “Hibiscus” bright pink to paint thinner strokes between the coral strokes. I used a clean, new paint brush to paint the silver glitter across the edge of the white tip. I used a clean brush so that there was no colour background, effectively producing another line. A top coat, covering the tip of the nail and wraps around the the back of the nail, finishes the look nicely. Hey Presto!


Oodles and Toodles
Row Bow
x


I love the pretty pink detailing on these x
Laura | A Life With Frills
Thanks Laura! It is a pretty cute idea.
Row Bow
x