
Hey Guys!

I really like the, what I’m calling, China Print skirt. The print reminds me of the kind of art you’d find on your Grandma’s china wear, plates, tea cups and tea pots. It was looking lonely on a pile of jumpers, so somebody had decided that they didn’t want it and just threw it to the side. Poor skirt! Having seen the amazeballs sale sticker I couldn’t not pick it up. I bought it for £1! When I got to the till the sticker wouldn’t read so the lady was going to charge me £5 for it, so I wouldn’t have taken that. But then the manager wasn’t really paying attention and put it through for £1. Yay me!

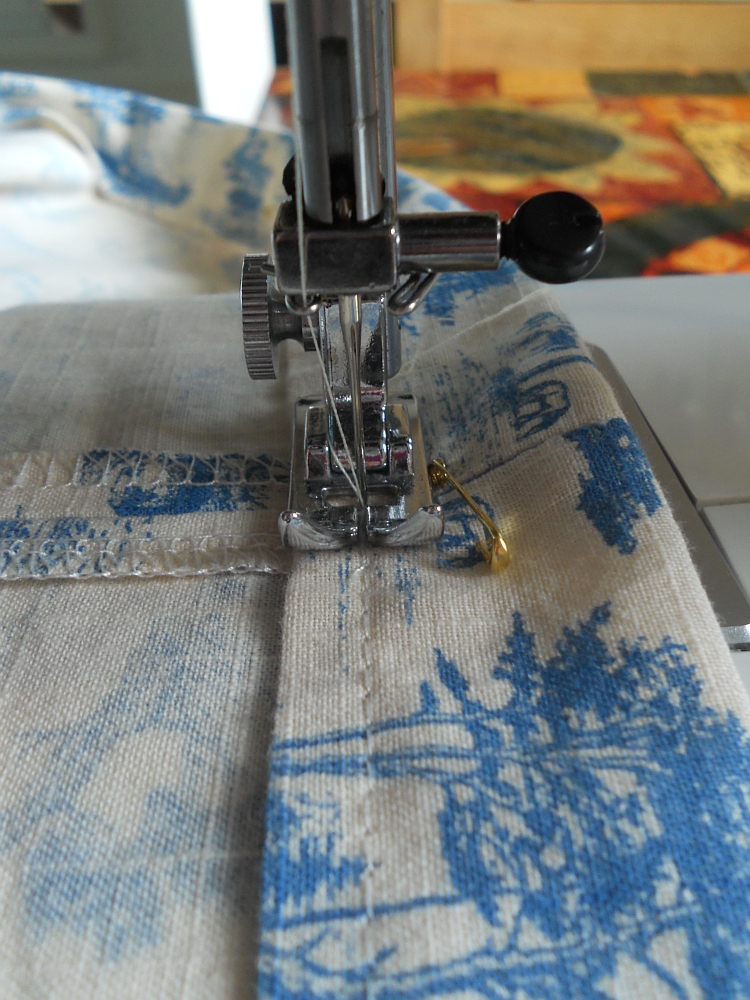
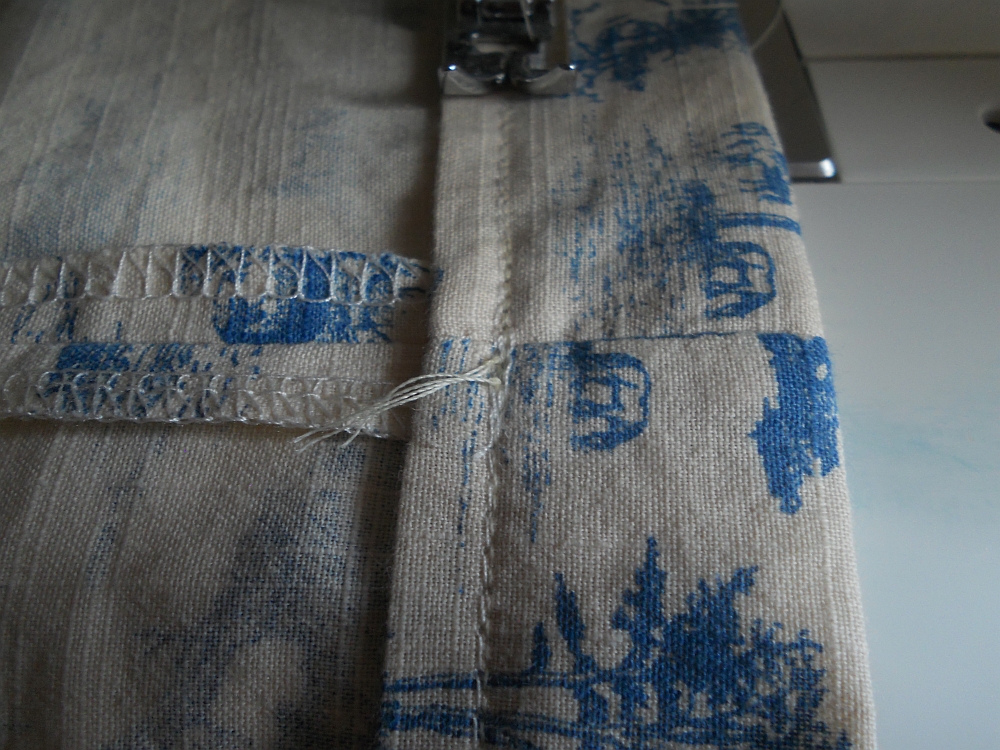
The skirt original was faaaarr too big for me, as you can see. The pattern of the skirt was a very simple tube style with marginal gathering to add a little shape to the piece. The waist band is just an inch of extra material folded in half and wrapped around the top of the skirt. I decided to insert a piece of elastic the length of my own waist through the existing waistband on the skirt. To do this I unpicked the stitching either side of the zip and attached a large safety pin to the end of the elastic. This makes it easier to thread through the fabric waistband as you can feel it and pull it along. You can see the elastic I used was about ¾ of the width of the existing waist band. Any bigger and it wouldn’t have gone through flat. Or any smaller and the elastic would break down quicker with wear.


Then I safety pinned the elastic either side of the zip to secure it as I sewed it into place. A couple lines of straight stitch over each other will secure the elastic in place.


 |
| Wasp-Sting-Gate documented by twitter and my loving sister. |

But I decided that I still wasn’t quite happy with how the skirt was sitting. I wasn’t sure if there was too much fabric at the bottom of the skirt compared to the new littler waist. In the end it was decided that the skirt was just a little too long. So to turn up the hem first I chose how much I wanted to take off the bottom. I pinned it up a few different lengths and as well as looking in a mirror, I asked how it looked to other people. I turned up the hem of the skirt by 1 ½ inches all around.

To make it easier to sew into place I pressed my new hem line with a quick iron. I kept the excess fabric attached because I thought it would create a rounder shape on the skirt rather than cutting it off and leaving it a little flimsy.

I used my sewing machine and sewed over the top of the original hem line so I knew I was going to get a straight outcome. Once I got to the end of sewing in my new hem I went over the beginning and end of the hemline to secure it in place then simply cut the thread and tie it off. A Voilà, all done! Easy Peasy!


That looks really nice! Lovely blog xx
thebudgetbuyer.blogspot.co.uk
Thanks Abbie! Don't forget to check out the 'Tea Party Chic' post to see how it looks all finished.
Row Bow
x